osu!mania
Intro
Hi! Welcome in the last article where we will touch upon gameplay. And this time around we’re gonna focus on osu!mania. Many agree that it isn’t the easiest thing to do because of its quirks and overall lengthy configuration. But I’m positive with the help of the tutorial you’re gonna pull through just fine.
Disclaimer
Before we begin, let me preface the video with a little disclaimer. Mania skinning involves a lot of skin.ini configuration. So not only do you HAVE to understand how the ini file works (we have a tutorial for that), a lot of the skin.ini options will not be mentioned in the tutorial to save on time, only the most crucial ones will be.
If you want to know the rest of the skin.ini commands, you should head to the skinship wiki and read through the mania section of the skin.ini page. All of the commands have useful descriptions which will help you understand what each one does. And if some description is unclear, you should let us know and we will update the website with a clearer explanation. You could also join the skinship discord server where you will surely get help from seasoned skinners.
Mania skinning also has this neat little thing which allows you to name all of the files whatever you want and even store them in a subfolder within your main skin folder. While it won’t work out of the box, a little bit of skin.ini tinkering will make the game recognize the files you’re about to make. So it’s best if you decide on this now, and choose whether you want to use the default names and location, or have a little bit more organized experience with a dedicated folder for your mania assets.
Lastly, this time around there is no template. Mania configuration is so insanely complex where a photoshop template would simply not be possible to make.
Skin.ini
You’re gonna start by creating a very minimal skin.ini configuration of your stage. Some of the assets you make depend on the width of the columns, so it’s best to have that set before you begin making images for the keys and notes in order to avoid frustrations.
Open your skin.ini file, and add a new [Mania] section at the very bottom of it. Then add a Keys: line right below the section name so you can easily differentiate which keycount it’s for. This is the main difference between this section and any other one. Multiple [Mania] sections can coexist within the same skin.ini file as long as they are used for different keycounts.
[Mania]
Keys: 4
...

[Mania]
Keys: 7
...
Your [Mania] sections should always be below every other section. Those grow in size very quickly, so for example if you skinned all keycounts, you would have a total of 14 different [Mania] sections, each longer than the previous keycount, and if your [Colours] section was sandwiched between two lengthy ones or be at the very bottom of them all, it wouldn’t exactly be the most optimal way to have things organized within your file. So just put your [Mania] sections below everything, and you should be fine.
And for your information, any commands mentioned within the next sections are meant to be placed under the [Mania] section. Unless it’s explicitly disclosed that a command goes somewhere else, you should just assume that it goes with the other mania commands.
Now would be the best time to set up your column widths. To do that, add a ColumnWidth: command under your desired keycount. The trick here is that you need to specify the width of each column as a comma-split list.
So if you are setting up your 4k columns, your ColumnWidth: should look like this: ColumnWidth: 50,50,50,50
Like this for 5k: ColumnWidth: 50,50,50,50,50.
And like this for 6k: ColumnWidth: 50,50,50,50,50,50. So on and so forth.
But that’s assuming you want all columns to have an equal width of 50, so change this value to whatever fits your needs. If you have some extraordinary vision, you can make all of the columns have different widths. Just like you can change only one of them to be like in beatmania style VSRG’s for example, in that case, your 4k ColumnWidth: would look like this: ColumnWidth: 100,50,50,50.
Okay okay, so now that we have this covered, you probably want to adjust the position of the stage on the screen. Most want it centered, but there is a little caveat when it comes to the stage positioning. The games uses static values for the ColumnStart: ini command, which controls at which point the left-most column is drawn. That means if you change this value to for example be centered on your 16:9 screen, someone who uses a different aspect ratio will see it in a different place. There isn’t anything you can do to prevent this, but it’s good to know in order to avoid future confusion. The value you should input in ColumnStart: also depends on the width of your columns. You can try finding it by trial and error, but if you want to be certain, or simply don’t want to bother, Roan has made a program which will help you find the exact value when you input your settings into the fields.
Another thing that’s very important to many VSRG players is the scroll direction of the notes. You can change the stage to send the notes from bottom to top by setting UpsideDown: to 1. There are also a lot of other commands related to flipping the stage, but for that you’re gonna have to visit the wiki yourself (click here) because explaining them would just pad the article a bit too long.
Generator
Once you know the inner workings of the skin.ini, you should give the skinship mania skin.ini genrator a try. It automates the creation of the configs for each desired keycount with the settings you enter. While some settings are ommitted (mostly the lane specific ones since they would be annoying to implement while keeping things quick and flexible), the vast majority of the otherwise manual work is done in a matter of seconds.
Start by selecting whick key counts you want to generate [Mania] configs for by ticking the checkboxes at the very top. Then fill in your settings as you see fit, and click the generate button at the very bottom of the page. Then paste the output you get at the bottom of your skin.ini.
Centering the stage
Enter the in-game resolution of the aspect ratio you’re making a skin for in the Monitor width and Monitor height inputs, change the ColumnWidth value to the one you want to use. Then set the ColumnStart input value to -1. This will make the generator automatically calculate the ColumnStart value for each selected keycount with your settings.
Paths
The bottom half of the generator is filled with a lot of inputs related to Colours, Paths, and "Patterns". These are there to make stage configuration quite a bit easier. Instead of manually typing each path for each lane for each keycount, you only need to define them once. Then in the Lane Patterns inputs you can reference them by the number right above that path’s input.
So for example, if you wanted to have 3 note colors for 7k, your NoteImage Paths inputs could look like this:
1:mania/notes/note12:mania/notes/note23:mania/notes/noteS
And your 7k input within Lane patterns could be 7k: 1213121, 7k: 2123212, or any other combination as long as it uses just the number of the inputs from NoteImage Paths which you have filled.
The same goes for any other lane specific Paths or Colour inputs. The generator will automatically apply the Colours and Paths you entered to the respective numbers of the pattern, making matching and editing a lot easier.
Notes
Regular
Now that you have some initial ini setup, we can move on to making the gameplay a bit nicer by skinning the notes. Notes are divided into the regular notes, so the ones you just click, and hold notes, otherwise referred to as long notes or LNs. The 3 most popular style variations for them are Bars, just like the default skin, circles, and arrows. That doesn’t mean these are the only ones you can make, if you have an idea you’re more than welcome to execute it and make your notes whatever shape you want.
All of the note assets will automatically stretch to fit the width of the column. But that’s the thing, they will only stretch not scale. So if you make circle notes at a certain resolution, and then check them in-game, they may look stretched one way or another. In that case, you have to resize them in your editing program until they appear correctly, otherwise you can adjust your ColumnWidth: to achieve the same effect, but that’s not something many would want to do.
By default the note files you’re about to make are named mania-note{x}.png, where the X is replaced by either 1, 2, or the letter S, symbolizing the Special key in the middle of odd keycounts. The 1 and 2 on the other hand are referring to the 2 color variants of the notes. That doesn’t mean you’re forced to make the notes different colors, but if you’d like to, then you have that option.






When skinning even keycounts above 4k, you can change which lanes the colors are applied to by changing SpecialStyle: in your skin.ini to 0, 1, or 2.
So now that you more or less know what you’re dealing with, it’s time to make the actual assets. Make a large canvas in your image editing program where you will place all of the assets, and make your note shape with the shape tools. Style it however you want, and if you want to, make 2 more variants for note2 and noteS, then export them with the appropriate name to the main skin folder, which in this case it would be mania-note1, mania-note2, or mania-noteS for the special key.
But, if you want to keep your files a little bit more organized, you should make a dedicated folder for your mania assets inside your skin. And then inside your skin.ini change NoteImage#: to {folder_name}/{asset_name} without @2x or the .png extension. Replace the # with the number of the lane the note should be used on, starting at 0 for the left-most one. So if you were skinning 4k, with all of your notes using the same asset simply named [email protected] from the mania folder inside your skin, your config should look like this:
NoteImage0: mania/note
NoteImage1: mania/note
NoteImage2: mania/note
NoteImage3: mania/note
And if you were skinning 7k with dual colored notes + a special one for the middle lane, then your config would look like this:
NoteImage0: mania/note1
NoteImage1: mania/note2
NoteImage2: mania/note1
NoteImage3: mania/noteS
NoteImage4: mania/note1
NoteImage5: mania/note2
NoteImage6: mania/note1
Now go back into the game, start a map, and check how the notes scale to your ColumnWidth:. If they look okay, that’s good! But if they’re stretched then you’re gonna need to adjust WidthForNoteHeightScale: in your skin.ini, the width of your columns, or the assets themselves. When adjusting the assets try making them smaller or larger, and see what’s giving you better results. You also don’t need to keep the aspect ratio and can just compress them on one axis yourself, since the game will stretch them the other way anyway.
Long Notes
Okay, with the notes covered, we can move on to LNs or hold notes. Each long note consists of 3 assets and just like the regular notes, has 3 variants. 2 for the regular lanes, and 1 for the special lane in the middle. The 3 assets that make a long note by default are named mania-note{1/2/S}H for the head of the note so the part which you need to press the key on, then it’s followed by mania-note{1/2/S}L which is the body of the note, the one you keep holding the key on, and then at the very end there is mania-note{1/2/S}T, which is the tail on which you’re supposed to release the key.










The centers of the LN head and tail are aligned to the beginning and end of the LN body. Unless you have a very good reason, your LN body should be a regular rectangle. Otherwise it may look weird and be confusing to play. LNs also have one setting which changes how it behaves when it comes to stretching until the LN Tail. By changing the value of NoteBodyStyle, you can make it 0 -> stretch, 1 -> cascade from top, or 2 -> cascade from bottom. These may not make that much sense when said, so here’s a visual example which will show you the clear difference between them.
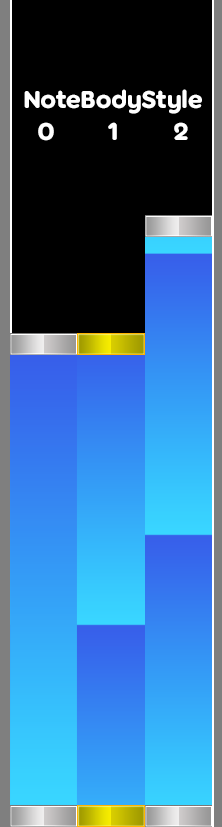
And just like the regular notes you now have enough information to make your LN assets. Export them, name them what they need to be, and test in-game. Adjust as needed until it fits well with your stage. If you’re going to use the skin.ini to give them their own names or save them in some directory other than default, then here are the commands you need to add:
NoteImage#H: {folder_name}/{asset_name}
NoteImage#L: {folder_name}/{asset_name}
NoteImage#T: {folder_name}/{asset_name}
Replace the # with the lane number starting at 0, and set the value to the path to your file. If you don’t store your files in a subfolder within the main skin folder, then just set the value of the command to the filename like this:
NoteImage#H: {asset_name}
NoteImage#L: {asset_name}
NoteImage#T: {asset_name}
Percy
A very common skinning “exploit”, is called Percy (named after Percyqaz who pioneered the technique). Visually, percy shortens the ends of LNs, which helps some people with reading LN heavy maps. To achieve it, you need to do several things:
-
Make your LN ends transparent. They will be now baked into the LN body texture.
-
Make your LN body texture
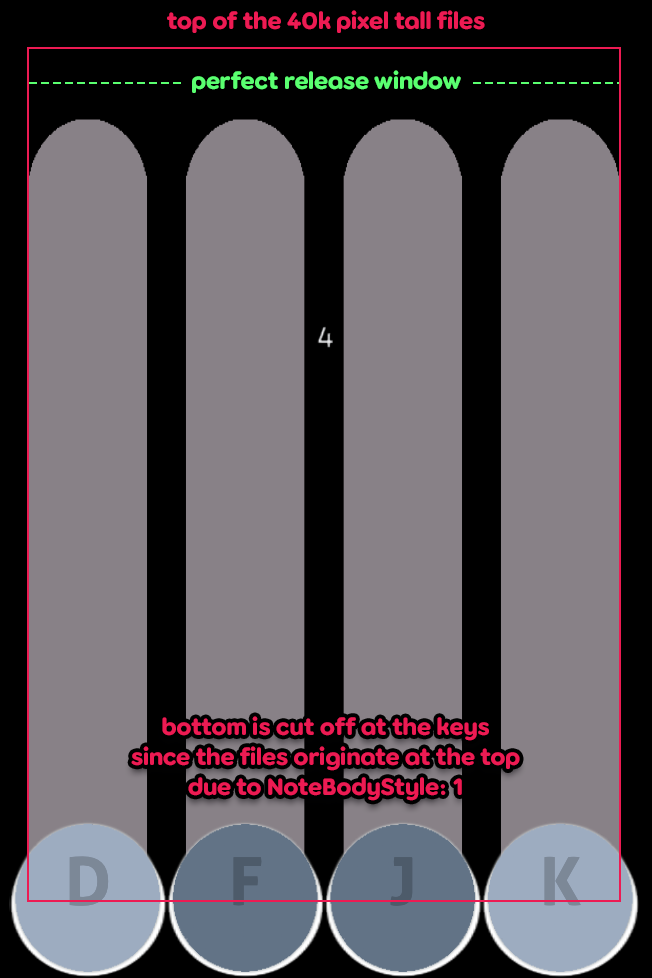
40000pxtall. Yes, you read that right, it needs to be fourty thousand pixels tall to support very long LNs (like a few second long suspense at the end of a song). If your notes are anything other than bars, then you’re gonna need to adjust the end -
Move the entire texture a bit down, but no more than the width of the note. Anything more than that may cause players to miss when they thought they were within the release window.
-
Export it
-
Inside of your skin.ini, find the
[Mania]section for the keycount you want to edit and setNoteBodyStyle:to1.
How exactly does percy work?
As mentioned earlier. You essentially make an absurdly long texture and offset it a bit to trick your mind into releasing the key once the LN is fully out of the picture instead of releasing the key at the end of the LN. NoteBodyStyle: 1 is necessary because it makes the LN body texture repeat from the top of the LN, which works perfect in this scenario since the texture is 40000px tall and there is very little chance for the texture to actually show the repetition. If it was shorter there would be a chance for a few seconds long LN to show them, which could cause the player to miss.
Stage
Lane colors
Speaking of the stage, with the notes done, now would be a good time to finish skinning and configuring it. The first thing to consider would be changing the lane background colors. This is also done via skin.ini Using the Colour#: command. The difference between this one and any commands which were setting a color of something lies in the value this one uses. Previously covered commands used RGB, this one uses RGBa. The A is the alpha or opacity value from 0-255. The higher the number the more opaque the color is. So go to your skin.ini and change the Colour#: value to something that would fit your skin well. Remember to replace the # symbol with the lane number, but there is a catch. The lane numbers start at 1 this time around. You’re probably noticing that osu!stable is not very consistent with naming things. Hopefully that will be fixed in lazer. Anyway, add a Colour command for each lane to your skin.ini, and set its value to some RGB color, then add the alpha value at the end manually. Your finished product should look like this: Colour1: 26, 30, 38, 128
If everything went well, you should see the color change after you refresh your skin with Ctrl + Shift + Alt + S. For performance reasons, players tend to always leave the lane background black since it’s the most contrasting with the notes. But you don’t have to solely focus on performance to make your skin play well.
Lane separators
Now you can move on to another part of the stage, which are the lane separators. Some love them, some hate them. It’s all personal preference. The default skin already has them, so osu! loads the value even if it’s not present in your skin. To change them, you’re gonna add some skin.ini commands once again. The two you’re gonna focus on are ColumnLineWidth:, and ColourColumnLine:. ColumnLineWidth:, like the name suggests, changes the width of the lines. By default this value is 2. So if you don’t want them, just change it to 0. You can also specify different widths for different lanes by setting the value to a comma-split list like this one: ColumnLineWidth: 0, 1, 2, 1, 0
Just remember that the separators also exist on the sides of the stage, that’s why there are 5 values for 4k instead of 3.
To change their colors, just add some RGBa value to ColourColumnLine:. You know how it works at this point.
Stage left/right
To further customize the stage, we’re gonna look just a little bit outside of it. You can add some cool details on the sides by skinning mania-stage-left.png and mania-stage-right.png.


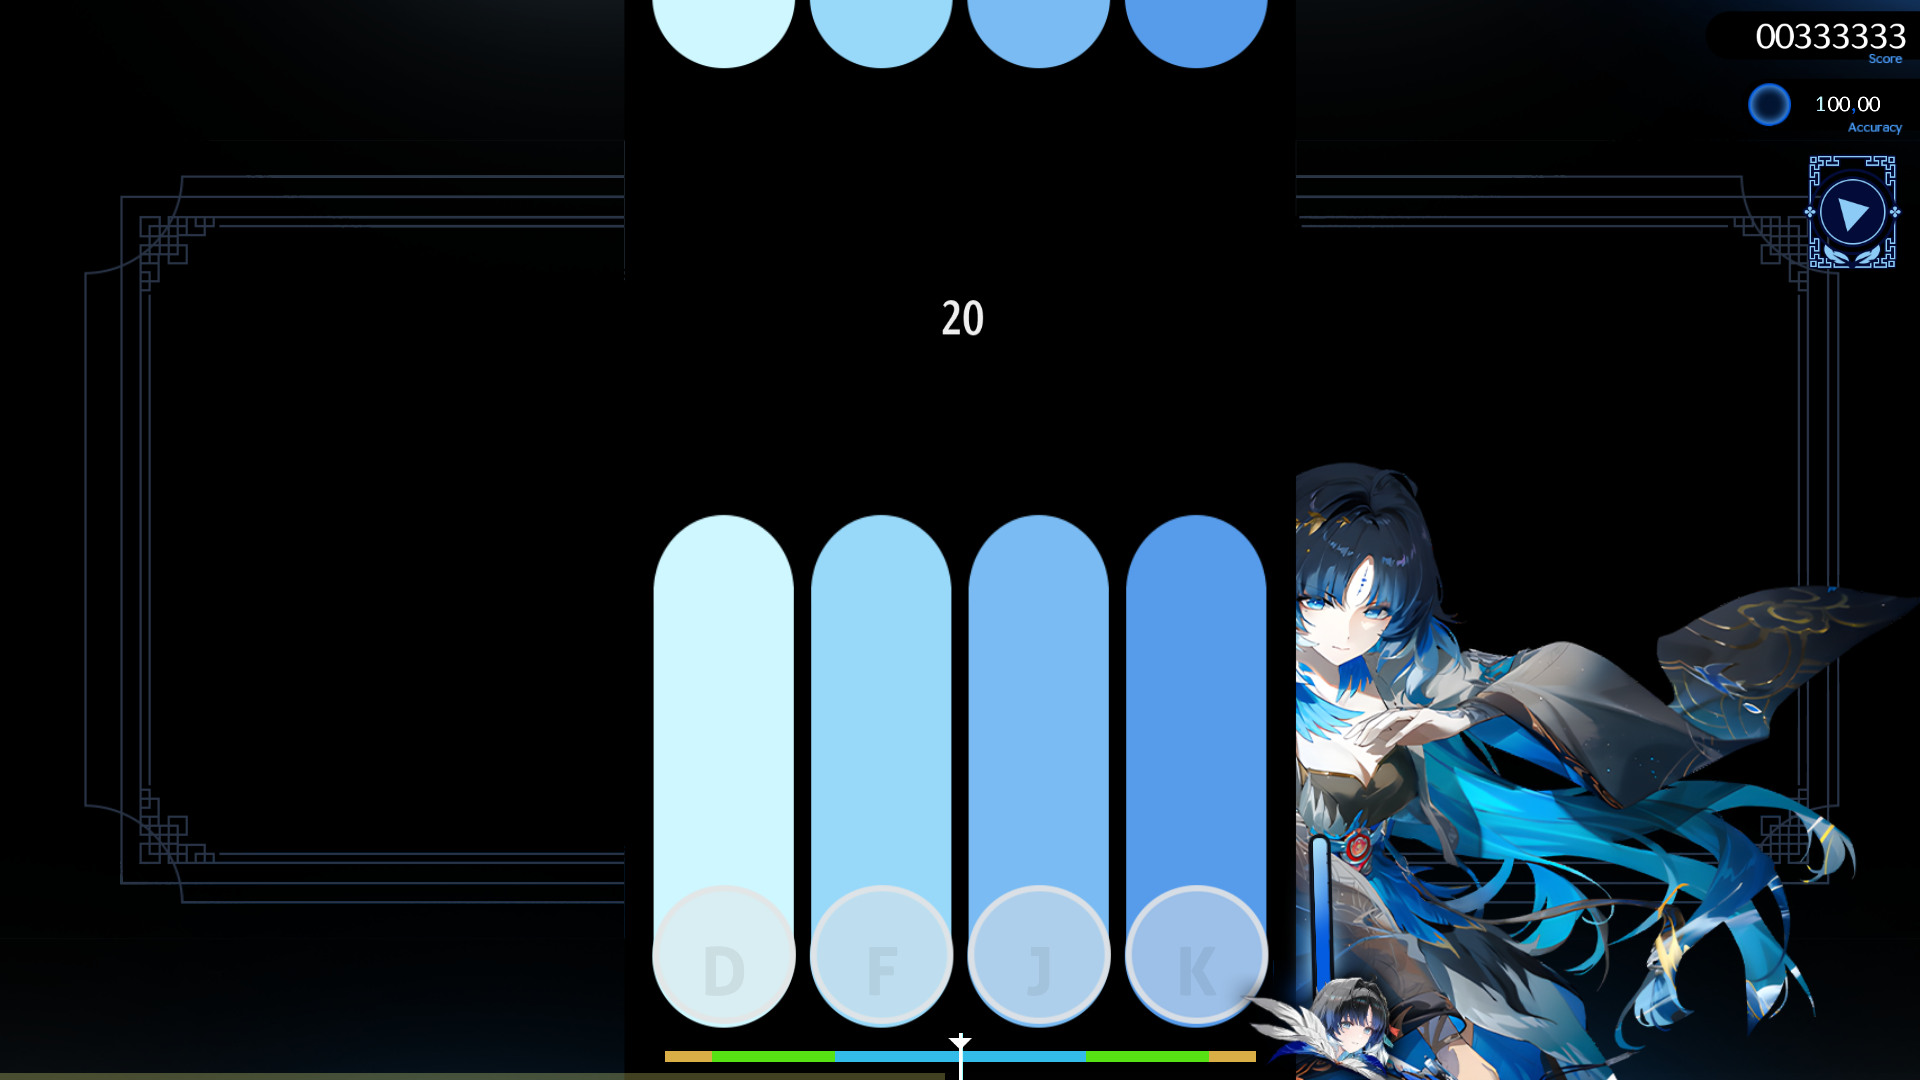
Those are just regular PNGs, which will stretch to fit the stage, but have their height limited to 1536 @2x max. So those are the only things about them which you need to consider.
Combobursts
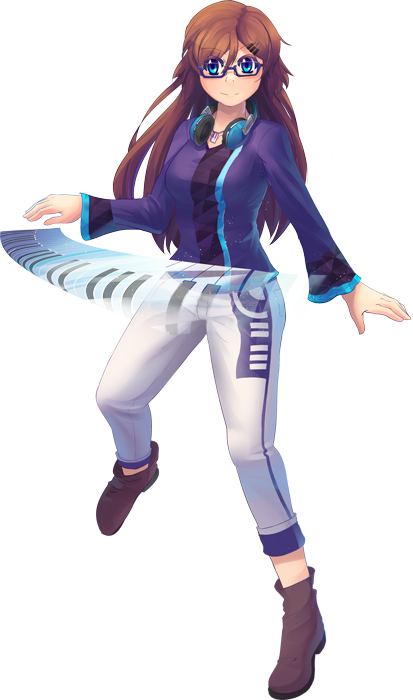
Mania also has its own combobursts. Which again, follow the usual comboburst behavior and naming pattern. The files themselves need to be named comboburst-mania.png, and the rest goes as usual. If you want to know all the ins and outs of combobursts, read the part of the osu! Standard article where they’re explained in detail.

Stage Hint

There is still one more thing which is constantly tainting the stage with its default appearance. The mania-stage-hint.png at the bottom, right above the keys, shows the area which the games uses as the position on which the notes should be hit for a perfect judgement. More specifically, the middle of this asset is used to evaluate that, but that doesn’t mean you have to make it taller or shorter in order to move the judgement line up or down. This asset is just used as a visual representation of the judgement line, not the judgement line itself. You will learn how to adjust its position later in this tutorial.

Mania-stage-hint stretches to fit the entire stage. So you can very well make it a very narrow image to save a bit of memory.
Stage Bottom
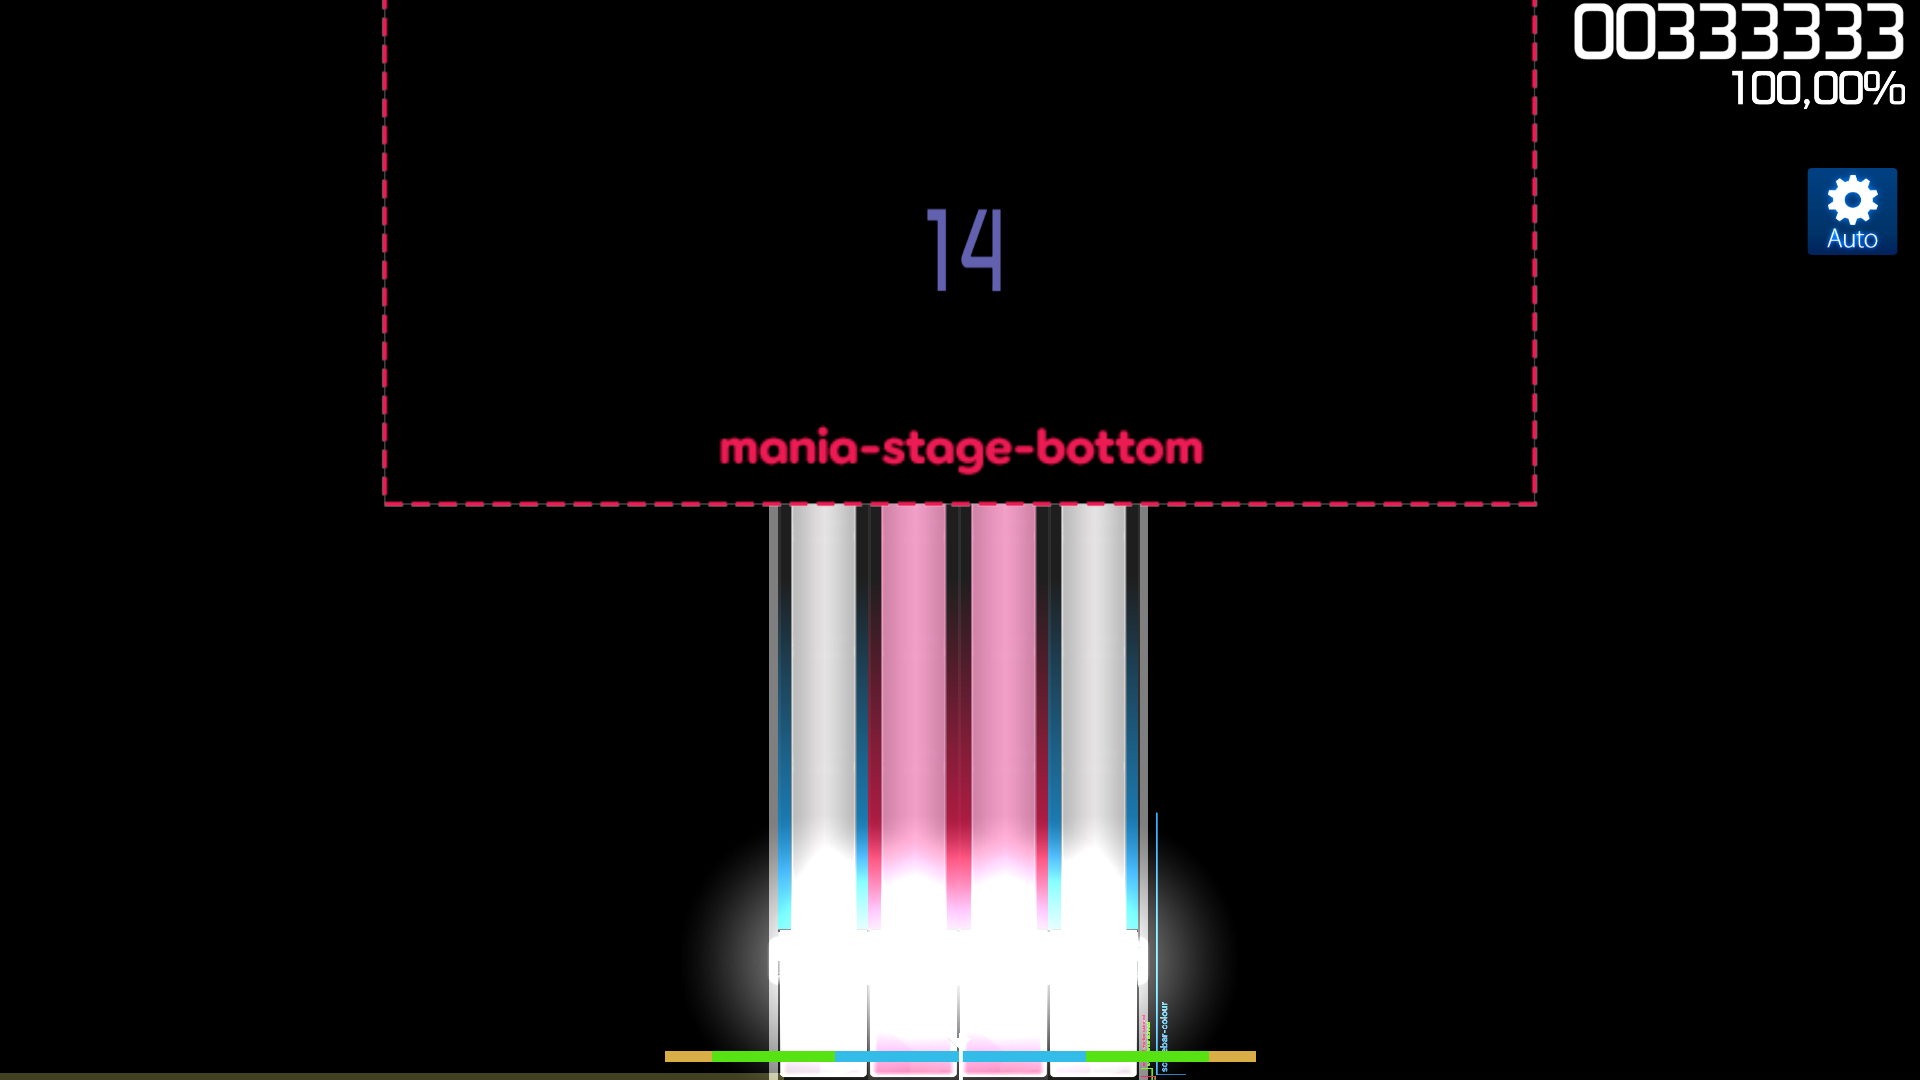
mania-stage-bottom.png is another asset which you can skin. But this time around it’s not present in the default skin at all. This asset is anchored to the bottom center of the stage, And unlike mania-stage-hint, it has a static width. So if you had made some intricate design for it and wanted it to work on different keycounts, you would have to make a different design for each keycount you want your skin to support, and then set the file that keycount should use in the skin.ini.

mania-stage-bottom.png also has a very aggresive 1.6x scaling factor which is hardcoded and can not be changed.
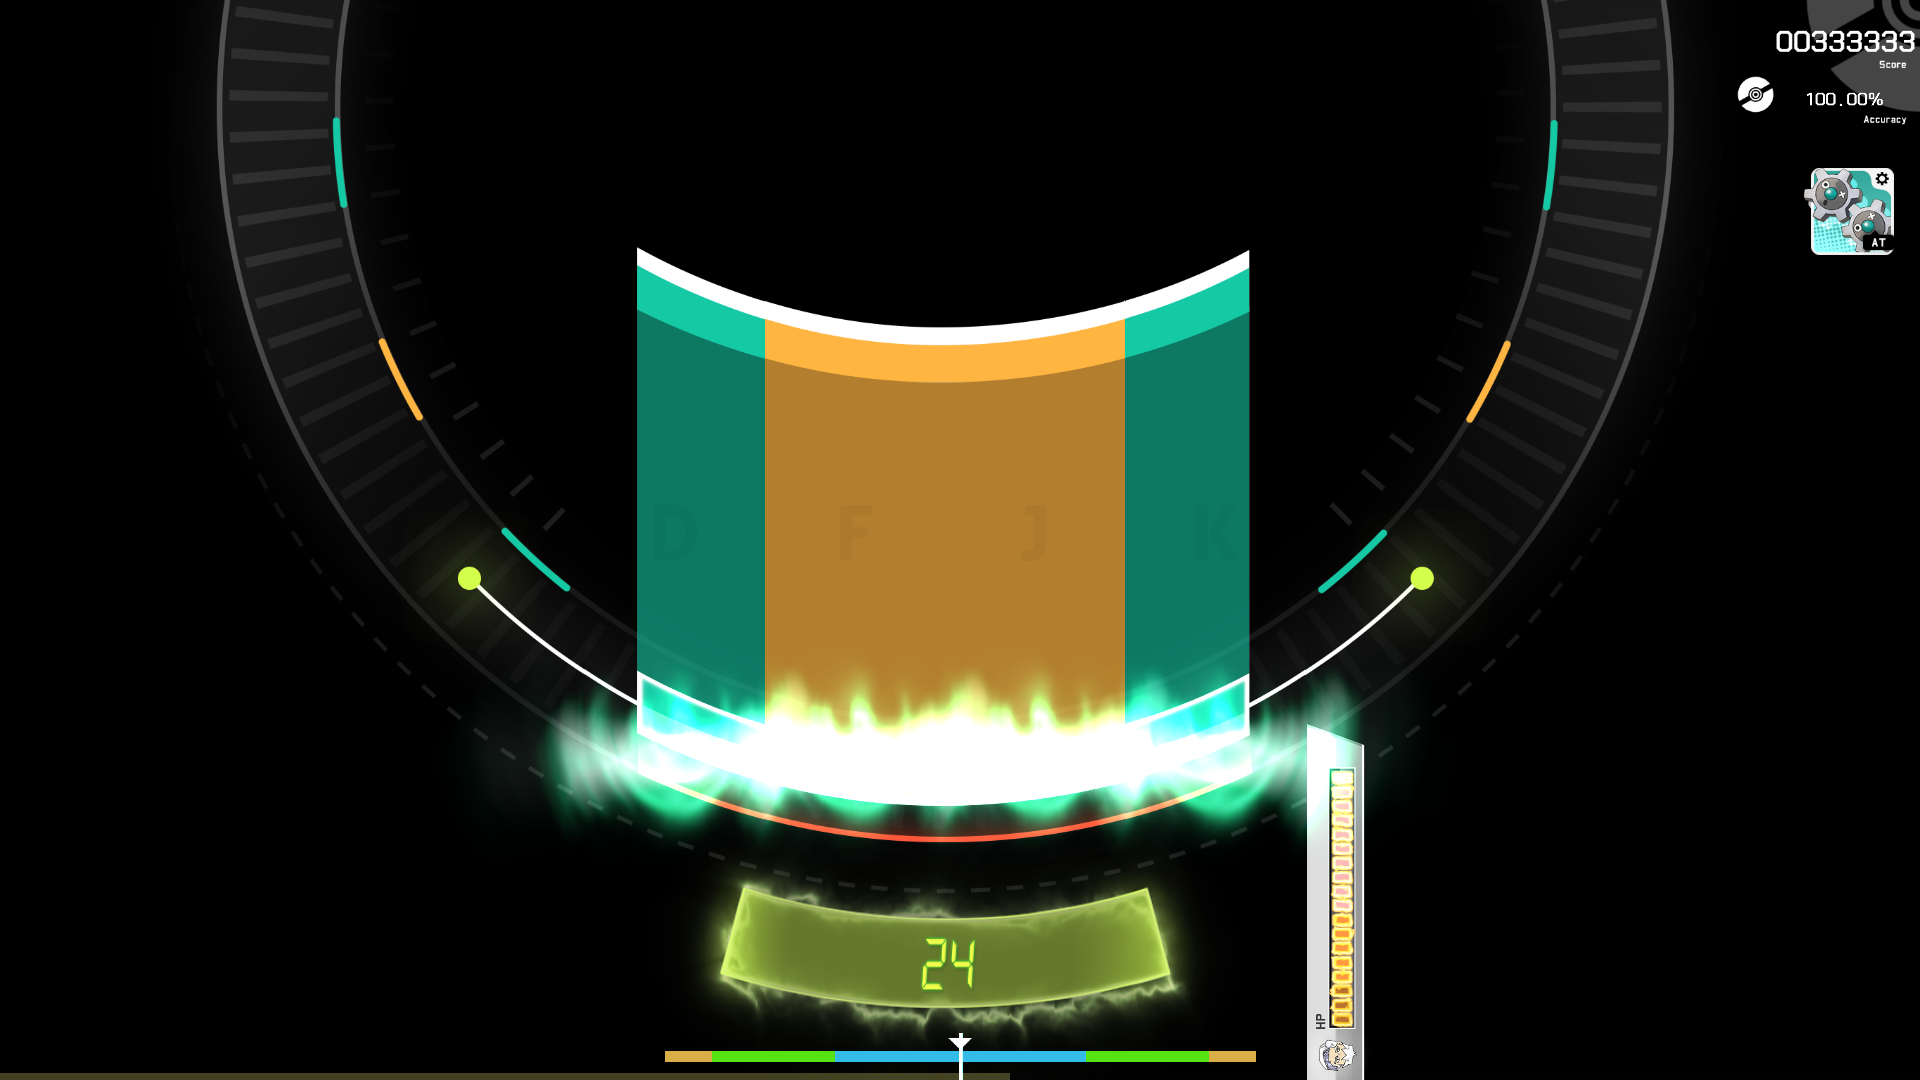
mania-stage-bottom.png is also used to make covers for the top of the stage, so the notes show a little bit further down. To do that, simply make your mania-stage-bottom.png tall enough to reach the top of your stage, then make it wide enough to cover 100% of its width. Make a black rectangle at the top or whatever you want really, and export your file.
Mania warning arrow
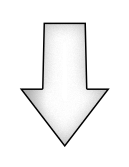
One small thing you can skin is the mania-warningarrow.png. It’s the little arrow indicator that scrolls before the notes appear which warns the player when the map is about to begin. The asset should be pointing downwards if you actually make it an arrow, even if you’re making an upscroll skin, the asset should still be pointing downwards since it’s automatically flipped by the game.

Stage lighting
Lastly, we’re gonna focus on the stage lighting. There’s a few different types, but they’re all super simple to understand.
Mania-stage-light

mania-stage-light.png is the light which appears on the stage whenever a key is pressed. It’s layered below the notes, and tinted white by default. The color can be changed by adjusting ColourLight#: in skin.ini. The value itself should be an RGB color, and the lane numbers (the # symbol) starts at 1. Depending on your stage design, you may need to adjust its position. But don’t do that by adding a margin at the bottom. Instead change the value of LightPosition: until it matches your expectation.

LightingN & LightingL




Next up we have two assets which are for the most part similar in their behavior, but are used for different notes. LightingN.png and LightingL.png are used for regular notes, and long notes in that order. They’re the assets which appear whenever a note is hit or held, and the asset itself is aligned to the center of the lane on which the note was hit, they also get flipped vertically when the stage is upside down. These can be scaled separately in each column with skin.ini by using LightingNWidth: and LightingLWidth:


Keys (Receptors)










With the stage and notes set up, we can finally move on to the part of the skin which will tie it all up. And you don’t have to look far, cause those keys are impossible to miss right now.
The keys consist of two states, which are probably very obvious, but they’re the idle and pressed state of the key. They’re a big part of the visual feedback which goes along with pressing a key and hitting a note, but there are still some players who prefer not to have any. Some players also choose to not skin the pressed state of the key, and instead use the mania-stage-light.png file instead, because of its fade out animation, which can be a creative addition to your skin. All you’d have to do would be exporting your key files as mania-stage-light.png, and then adjust LightPosition: in skin.ini.
Regular mania-key files
mania-stage-light trick
But if you want to learn how to do it the regular way, you’re gonna need to design a key, then make a copy of it, and do some adjustments so it looks like the key is pressed.
Then you’re gonna have to export both of these. The default naming scheme is exactly the same as the notes, with one difference; the pressed state has a letter D at the end of the file. If you associate it with “Down” then it’s gonna make more sense. And once again, if you want to organize your files or give them custom file names, here are the commands used for that:
KeyImage#: {folder_name}/{asset_name}
KeyImage#D: {folder_name}/{asset_name}
Replace the # with the lane number starting at 0, and set the value to the path to your file. If you don’t store your files in a subfolder within the main skin folder, then just set the value of the command to the filename.
Now go back into the game, refresh your skin, and check how your keys look like. If they’re stretched you may need to resize them until they look correct. But for some of you who want to use the middle of your keys as the reference point for hitting the notes, a new problem might’ve popped up, or perhaps maybe even two. The notes are not being hit in the place you intend them to. In that case, you’re gonna need to adjust the value of HitPosition:. The default is 402. So use it as a baseline, and adjust the number up or down until your notes align with your keys. And the other problem I was talking about might be related to the keys appearing over the notes when being hit, while you would like them to appear under them. To change that, set the value of the KeysUnderNotes: command to 1 and refresh your skin.
Hitbursts




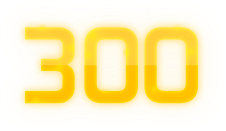
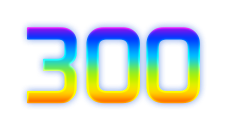


The very last mania specific thing we’re gonna cover are the hitbursts. And while being skinned essentially the same as any other hitbursts within the game; mania hitbursts have some more nuance to them. See, in standard, 99.99% of the skins you pick are guaranteed to have the 300s blank. But in mania, the players actually prefer to have them visible since many use them to anchor their vision to help them focus better. You also have a few more options to choose from when it comes to styling them. You can use the number the hitburst represents, and add some different colors to them to distinguish between the 300s. You could also write them out as text, like Marvelous, Great, etc. Or if you prefer simplicity, you could make them a simple dot, some icon, or whatever symbol you prefer.
The filenames are super simple. It’s just mania-hit followed by a number the hitburst represents. So for mania those would be 0, 50, 100, 200, 300, and 300g. Just like any other mania files you can also store them in their own folder and with their own names, and here are the commands:
Hit0: {folder_name}/{asset_name}
Hit50: {folder_name}/{asset_name}
Hit100: {folder_name}/{asset_name}
Hit200: {folder_name}/{asset_name}
Hit300: {folder_name}/{asset_name}
Hit300g: {folder_name}/{asset_name}
You may also want to adjust the position at which the hitbursts appear. To do that, change the value of ScorePosition: to any positive integer of your choosing.
Shared files
Lastly, I’m gonna quickly cover the files shared with other gamemodes, which for mania would only consist of the scorebar, as well as the score and combo numbers. You should read our dedicated gameplay interface tutorial if you would like to know how to make these. In this article I’m gonna mention one thing about the combo numbers. In mania, those appear near the top of the stage by default, and you can change their position by adjusting the value of ComboPosition: within your skin.ini. Just like ScorePosition, the value should be a positive integer.
Outro
And that’s it. We’re done with the gameplay part of the tutorial. It was quite a lot to cover, especially for this article, but hopefully it made it easier to follow than figuring it out on your own. If it didn’t, remember we have a very active discord server with multiple skinners who are right there to share their wisdom with newcomers. So feel free to stop by if you have any issues, or even just want to hang around and share your progress with others.
Credits
- Zekuromu - by
Arlesium - 秧秧 I Yangyang - by
JonetoandDece - Pokemon (Drayden edition) - by
komo - 39 feat. 初音ミク - by
XetThe